Using multiple Infusible Ink colours to personalise your mug with the Cricut Mug Press is a lot easier than you think. I have previously wrote about how to use the slice tool in Cricut Design Space to overlap colours which you can read about here.
To use multiple colours, you need to ensure that no colour is overlapping and fit them together like a jigsaw. The Slice tool allows you to slice through any overlapping images meaning you can create the fitted jigsaw puzzle style.
I have a new tutorial perfect for Christmas that shows how to use the slice and weld tool in Design Space to create mug designs that include endless amounts of colours.
If you want to go ahead and make the project immediately, I have saved it as a project which can be made now here. (This design is for 15oz mug and if using a smaller mug, will need to be created using the steps below.)
If you are a beginner I recommend reading my Design Space for beginners blog here, if you are wanting to understand further how to create your own designs, subscribe to my newsletter here and receive a free PDF guide on how plus free tutorials and tips and tricks!
You will need:
How to make:
Step 1
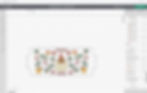
Firstly, head to Design Space and open a new project. Then select projects and search for mug. Select the Mug Design Set Up project and choose your finished mug size (this is detailed on the box). You can also click the link here to access the project.

Step 2
Insert the project into Design space. This provide you with the mug wrap template! The red guides need to be hidden before clicking make it (these show you where on the Mug this area will be placed) and we will also be removing the blue rectangle for this particular project too.

Step 3
Head to the images section and select all your festive images. You can filter by Christmas by heading to Category at the top on the page, selecting Holidays and then filtering by Christmas on the left hand filter bar.
The images I used were: #M30441DAB, #M312E615D, #M301145ED, #M30441DA2, #M30441CB9, #M30441DD2, #M30441CAC, #M30441D69
Copy each of these codes (including the hashtag) into the search bar in images to find each one.
Step 4
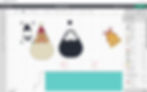
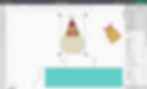
Any images where colours are overlapping need to be looked at and fixed so that they fit side by side like a jigsaw rather than overlapping.
The santa is a great example. The black eyes is actually a whole silhouette of the entire design. For working with Infusible Ink, we don't need this. Se we need to use the slice tool in order to cut into anything overlapping and ensure the eyes can freely placed and fit into the face like a jigsaw1!
You can only use the slice tool on two layers at a time so if there are multiple parts than need slicing into a new layer, choose two at a time.

Note: for awkward placed or smaller shapes that need dividing, use the shapes on the left-hand shapes panel to help with slicing like I have done with the nose below.

Step 5
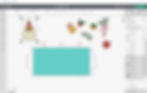
Once you have done this for all you overlapping images, start to place them into the mug wrap template.

Step 6
In order to keep the mug wrap cut (this is optional you could also just stick on each image to the mug and secure with heat tape) select one colour and attach it to the wrap.
Step 7
Cut out all your colours!

Step 8
Begin to assemble your different parts of each image together and secure onto the mug wrap using your Design Space project as reference for where it needs to be positioned.

Step 9
Once happy, wrap the design with the colours facing the mug. Start by one handle, wrap around until you meet the other side.

Step 10
Turn on your Cricut Mug Press. One the power button is green you may insert your mug by the handle and press the lever down.
After this white lights are shown. Let your mug heat up (the lights will go up and will reach the fifth light once your mug is ready). The machine will beep when your mug is ready to remove. Lift up the lever and only touching the handle, remove the mug. Leave to cool.

Step 11
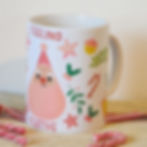
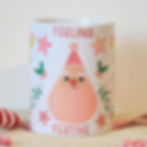
Once cool remove from your Infusible Ink backing to reveal your mug!
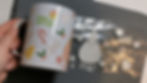
It's cute, bright and festive. Perfect for the winter season or as a gift. This tutorial not only gives you how to create this adorable design but teaches the fundamentals in using different colours with Infusible ink.
Thanks for reading,
Rebecca